Tuesday, October 26, 2021

Wallpaper ~ One Two Freddy's Coming For You

This wallpaper was created using the artwork Dave Nestler 66-1.  You must have a license to use this artwork.  Please visit CDO for more information.

I am also using the matching scrap kit ScrapCrys_IB_DaveNestler-66-1.

To save click the image then right click to save to your PC.


Monday, March 16, 2020

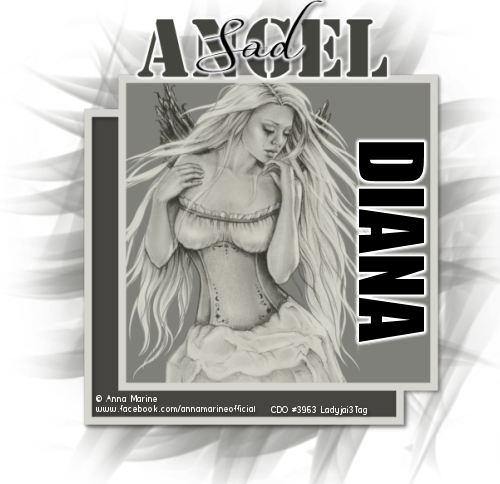
Simple Offset Box


Supplies Needed

Tube of choice  

I am using the artwork of Cuddly Rigor Mortis.  You must have a license to use this artwork.  Please visit CDO for more information.

2 Fonts of choice

I am using Simple Kind of Girl for my script font.  A free font found here.
I am using Impact for my bold font.

Mask of choice

I am using mask LLM-901 by Lori's Graphics found here.  You will need to scroll down to find it.  Put the mask into your Masks folder in PSP for easy access.  You can delete it later.

Plugins

Eye Candy 4000 Gradient Glow (if you do not have this you can choose to do a 2 stroke outline on your text with white).

Let's get started!

Open your tube, Shift D to duplicate and close original.

Open a new image 700x700.  We will resize this down later.

Choose a color from your tube as your foreground.  Close background color.

Choose your Rectangle Tool.  Line Style Solid.  Width 10.  

Draw out a large square about 400x400.  Objects, Align, Center in Canvas.  Convert to Raster Layer.  Rename this Bottom Frame.

Layers Duplicate.  Effects, Image Effects, Offset.  Custom, Horizontal 41, Vertical 41, Transparent, OK.  Rename this layer Top Frame.

Choose another color from your tube.  Click on Bottom Frame in your layer pallet.

Choose your Magic Wand.  Mode Add.  RGB Value.  0 Tolerance.  Contiguous checked.  0 Feather.  Anti-Alias checked.  Outside.

Now click inside the Bottom Frame layer.  Selections, Modify, Expand by 3.  Layers, New Raster Layer.  Flood Fill with your chosen color.  Rename this Bottom Color.  Selections, Select None.  Move this layer below your Bottom Frame layer.

Choose your Bottom Frame.  Add a Drop Shadow.  I used V 2, H 2, Opacity 44, Blur 5.94, Color Black.  Staying on Bottom Frame layer, Layers, Merge Down.

Choose your Top Frame layer.  Choose another color.   Click inside frame with Magic Wand.  Selections, Modify, Expand by 3.  Layers, New Raster Layer.  Flood Fill with your chosen color.  Rename this Top Color.  Selections, Select None.  Move this layer under your Top Frame layer.

On your tube, Image, Mirror, Copy, then click Undo and put tube back the way it was.

Staying on your Top Color Layer, Selections, Select All, Float, Defloat.  Paste your tube, position where you like, Selections, Invert, Delete.  Change Blend Mode to Overlay and reduce opacity to 68.  Layers, Merge Visible.

Copy and paste your tube as a new layer.  Re-size if needed and position where you like it.  Add same drop shadow.  Layers, Merge Visible.

Layers, New Raster Layer, Layers,Send to Bottom.  Flood Fill with another color from your tube.  Layers, Load Mask, Choose your mask, Layers, Merge, Merge Group.  Lower opacity to 68.

Choose text tool and your bold font.  Caps locked size 72.  Type out your main word.  I have chosen a quote and my main word is ORANGE.  Layers, Convert to Raster Layer, Effects, Eye Candy 4000, Gradient Glow, Glow width 3, Soft Corners 25, Overall Opacity 100, Draw Only Outside checked, click the Color Tab and change the color to white.  Ok.  Apply this two more times.

Add your drop shadow.

Text tool, type out remaining text in a different font.  My font is Simple Kind of Girl, caps lock off, in black, my size 22.  I typed it right over the main word and positioned it where I liked.  See my tag for reference.

Layers, Convert to Raster Layer, Effects, Eye Candy 4000, Gradient Glow three times.  Apply your drop shadow.

Using your Impact font, caps locked, size 72, type out your name.  Convert to Raster Layer, add same Gradient Glow three times, add drop shadow.  Image Rotate, Free Rotate 90 to Right.  Move to right side of your tag.

Layers, Merge Visible.  Image, Resize, 500x500 pixels, resize all layers.

Add your copyright and license information.  Save as a PNG.

This tutorial is designed for being flexible.  Change the fonts, use a different mask, don't do the mirror image step...whatever you like.  Make it your own!  I hope you enjoyed this tutorial.  If you have any questions or get stuck please write to me at dianadcreations@gmail.com

Here is another one with some changes
And here is one more with a few other changes

I made a few more changes and this showed up


Here is Ellen's awesome try!

I love what Bon did!

Look at what Belinda came up with!


Loving Genea's tag!  Who doesn't like dessert?
Bev came up with an fabulous 4th of July tag!


Here is WillowHoops awesomely cute tag!


Melissa tried the tut our and here is her super fab tag
Here is my friend Dottie's beautiful tag


My friend Belinda has a forum called Artistic Tag Passions and they tried out the tutorial.  Here are their results...aren't they fabulous!?  This just shows you how versatile the tutorial is...any color, any type of art, any saying.

Here is Penny's super cute Easter tag!

Kitty made a super cute one!

Look at the fabulous colors on this one Nancy made!

Karen's tag is adorable!


Wednesday, September 11, 2019

Wallpaper ~ London Calling

This wallpaper was created using Dave Nestler 58-2.  You must have a license to use this artwork.  Please visit CDO for more information.

I am also using the matching scrap kit ScrapGimptastic_IB-DaveNestler-58-2.

To save click image then right click and save to your PC.


Wednesday, July 31, 2019

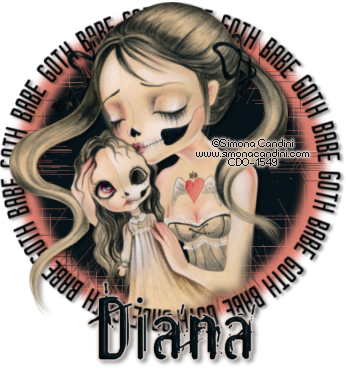
Tutorial ~ Goth Babe


Supplies Needed

Tube of choice

I am using Simona Candini 8-2.  You must have a license to use this artwork.  Please visit CDO for more information.

Word Art (circle shaped)

I am using some super cute FTU word art by KarmalizedKreationz.  (Update as of 11/2023 at the moment this site is down and I don't have an update for a new link.  You can find other circle word art or create your own using PSP and the Elipse Tool with Text Tool.)

Font of choice

I am using DJB Sissy

I am using PSP 9 for this tutorial but am pretty sure you could use any version.

Right, let's get started!

Open up a new image 700x700, don't worry we will crop later.

Choose 2 colors from your tube, one dark and one light.  I chose Black #000000 and Hot Pink #dd256d.

Make the Hot Pink (or your lighter color) your background and close the foreground.

Choose your Ellipse Tool, circle shape, show nodes, create on vector and anti-alias checked.  Draw out a nice large circle.


Objects, Align, Center in Canvas.  Convert to Raster Layer.  Layers, Duplicate.

Staying on the top layer, Selections, Select All, Float, Defloat, flood fill with your dark color, Selections, Select None.  Image, Resize, 88%, resize all layers unchecked.

Layers, merge visible.

Effects, Texture Effects, Fur.  Use these settings or play around a bit for a different effect you like.


Open your word art folder and choose Wordart 11, the Goth Babe circle.

Copy and paste your word art, resize.  I had to resize to 44%, resize all layers unchecked.  Adjust placing if needed, mine didn't.

Copy and paste your tube of choice.  I chose the top tube from this set and resized to 50%, resize all layers unchecked.

Position tube toward the lower part of your circle.

Add drop shadow.  I used V 5, H 7, Opacity at 31 and Blur at 0.

Layers, Merge, Merge Visible.

Add your credits.

Using your Crop Tool crop around your image and credits.  

Add the name.  I chose DJB Sissy, my lighter color in the background and darker color in the foreground, size 68, all lower case and stroke width at 3.  Position where you like, adjust size to fit the name.

Save image as a PNG.

Here is another example.

Using the same artist (AOTM-July-SimonaCandini-2019) but the other circle Wordart 12 that comes in Karma's fabulous word art bundle, different colors and DJB Crazy Goofy Cool font for name.


I hope you enjoyed this old school type tutorial.  Please leave a comment if you tried it out.  Feel free to share your results with me at dianadcreations@gmail.com.  With your permission I will show off your results.

Some awesome results...

This one is from Bev

This one is from Willow


This is from Bon
Here is one from Monti
(check out her awesome blog full of goodies and tutorials)


Here is one from Dottie!


Friday, May 24, 2019

Cluster Frame and Wallpaper ~ Spring Fling

This Cluster Frame was created using the kit Spring Fling by Tasha's Playground.

If you choose to share this frame please share the link to my blog.  Do not upload to your blog or any file sharing site.  Do not change the file name please.

Here is an example of what you can create.  I created a wallpaper with the frame using the artwork by Alicia Mujica.  Feel free to snag the wallpaper by clicking on it and then right clicking to save.

Download the Cluster Frame HERE


Preview of Frame.  Frame is on a 900x900 canvas which you can resize to your needs.

Monday, April 8, 2019

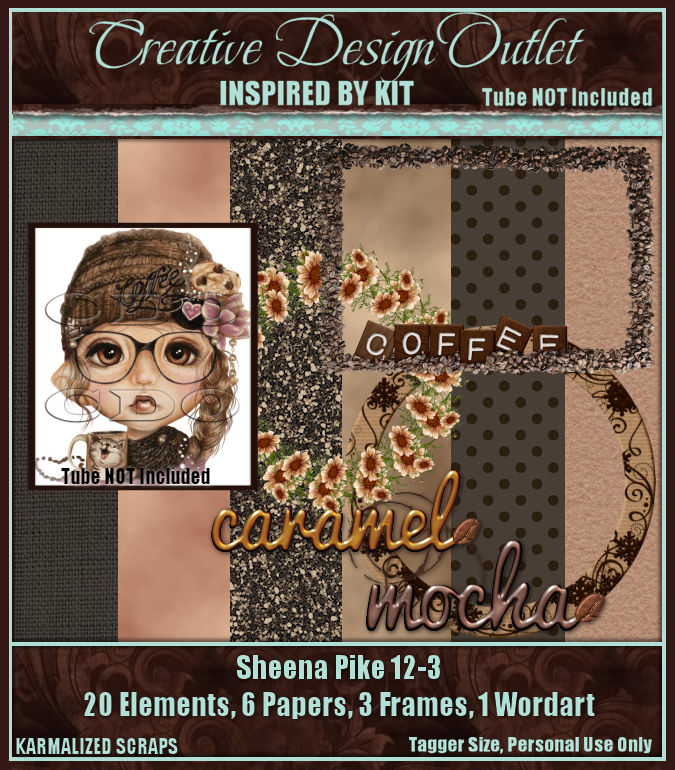
Wallpaper ~ Coffee Addiction

I created this wallpaper using this fabulous little coffee themed scrap kit by Karmalized Kreationz called ScrapKarmalized_IB-SheenaPike-12-3.  You can purchase this kit over at Creative Design Outlet along with the matching Inspired By tube Sheena Pike 12-3.


To save wallpaper, click on image below then right click to save to your PC.


Saturday, March 2, 2019

Theme Pack ~ Gilmore Girls Quotes

Hello, my name is Diana and I am a Gilmore Girls-aholic.

So I am a bit of a Gilmore Girls addict.  Since the networks used to show them several times a day I used to have my DVR full of each episode each season and would watch them every night several episodes a night.  Now Netflix has them, thank goodness, so my DVR isn't full anymore and hubby isn't complaining about "those da** Gilmore Girls shows taking up all the room".  Well seeing as I have watched each episode several dozen times over I pretty much know the dialogue by heart.  Here are some wallpapers I created with some fun lines from the show that I feel most GG fans will recognize.

Here is a preview, but only 3 of the 15 wallpaper are shown.  These wallpaper are very simplistic and in black and white.  I have used only the lines from the show and all credit for those lines goes to the writers and producers.  I have only used Free To Use graphics/clip-art.  Please do not change the file names or alter the wallpapers in any way.  Feel free to share the link here for other Gilmore Girl fans to enjoy.

Download HERE